How I set up a tightwire
by Matthew D. Wittmer
Check these photos out that show how I set up a tightwire.
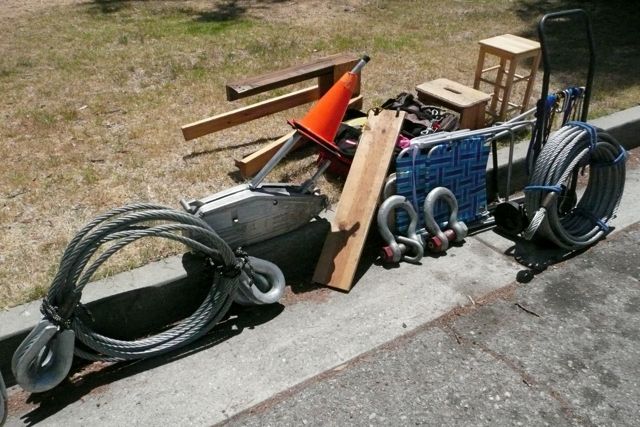
034_halfthegear2012
Some of my rigging supplies that I transport to and from my walk locations.
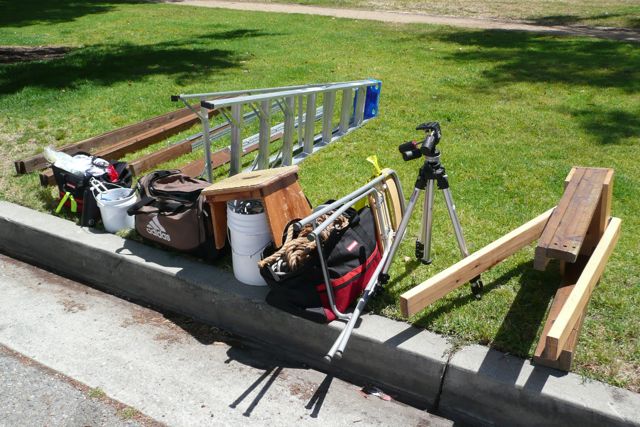
033_somesupplies
That’s an 8-foot ladder.

032_woodhoists
These are the wooden support pieces that raise my cable up to 10.5 feet high when assembled.
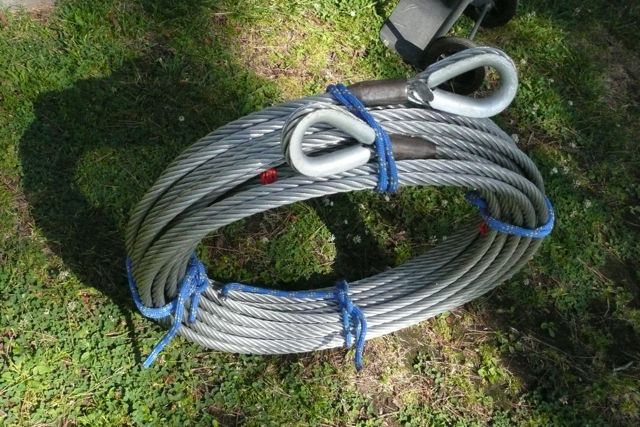
031_130feet
My 130 foot coil of 3/4 inch diameter cable for walking.
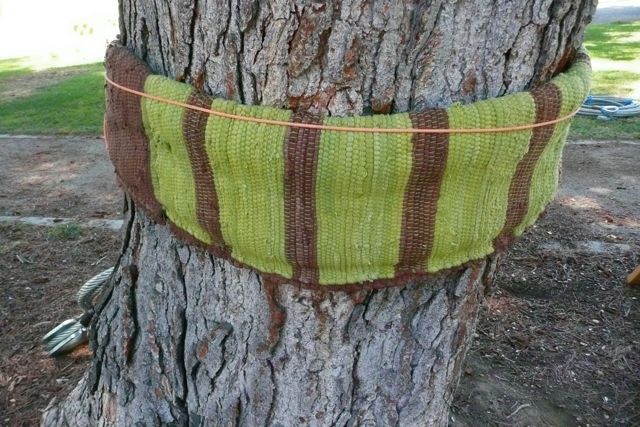
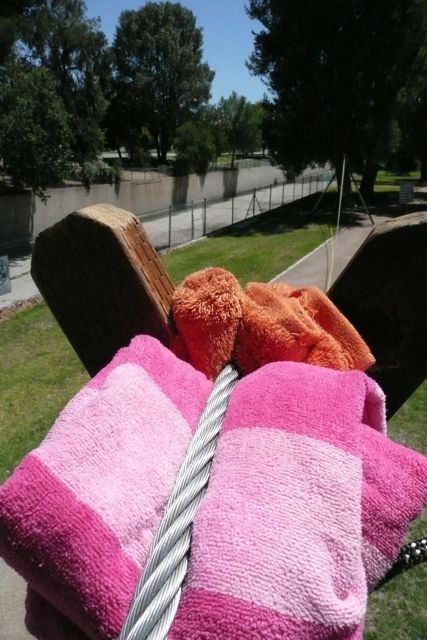
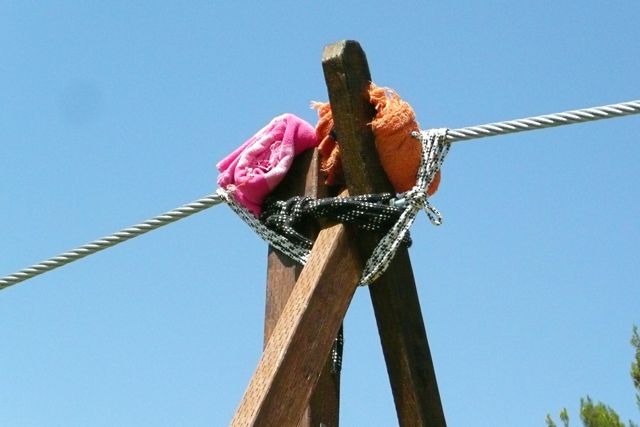
030_padthetree
I pad each anchor tree with a six layered mat & towel wrap that I hand stitched specifically to protect and wrap around the surface of my two anchor trees.
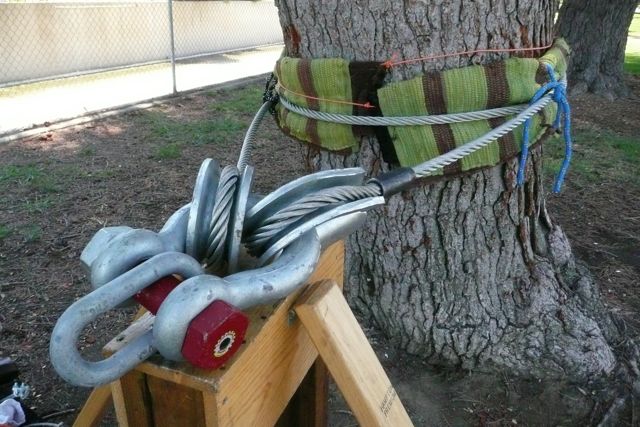
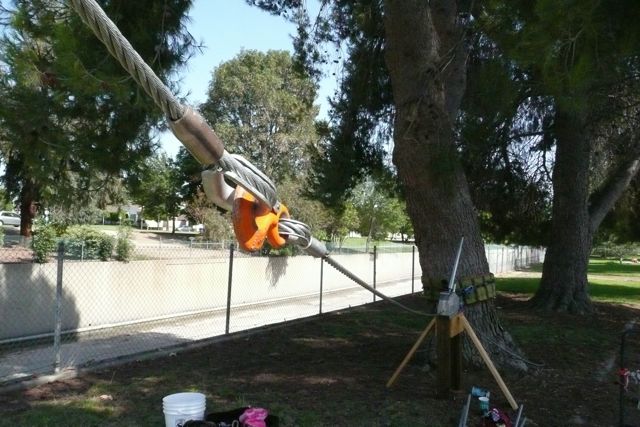
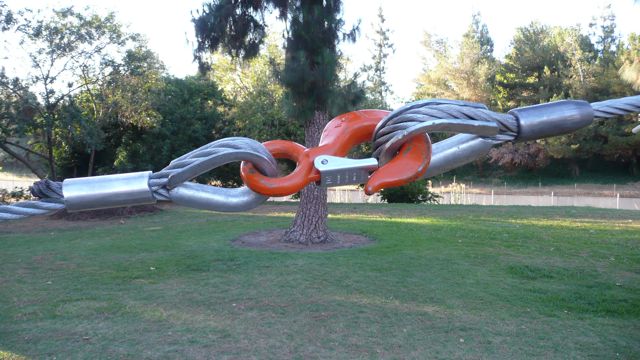
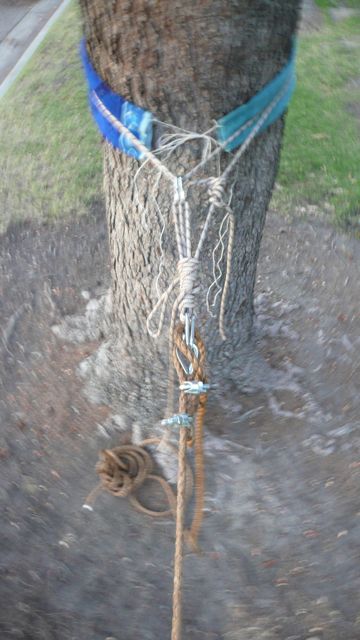
029_circlethetree
I wrap a 7/8″ diameter wire sling around the padding. The ends join in a monster Crosby shackle and a Crosby weldless link is secured into the shackle’s pin.
028_linktogriphoist
The pin on the back of the Griphoist TU-32 is then threaded through the weldless link.

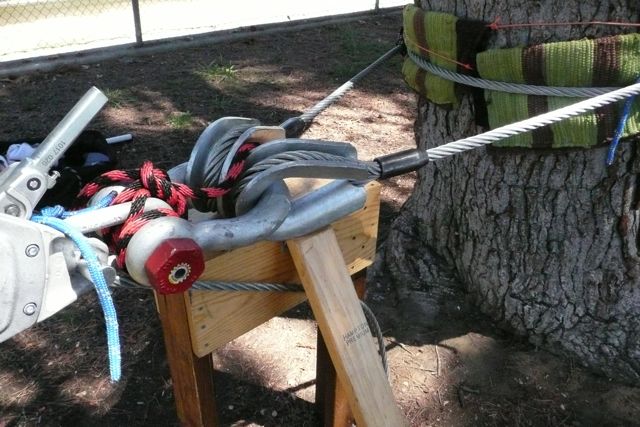
027_packsides
I use cord to pack the sides and center each link.

026_linktowire
My hoist cable then clips into the end of the 130 foot walk cable. My walk cable then runs over the top of one two part wooden support that will raise one end of the walk cable up to 10.5 feet high.
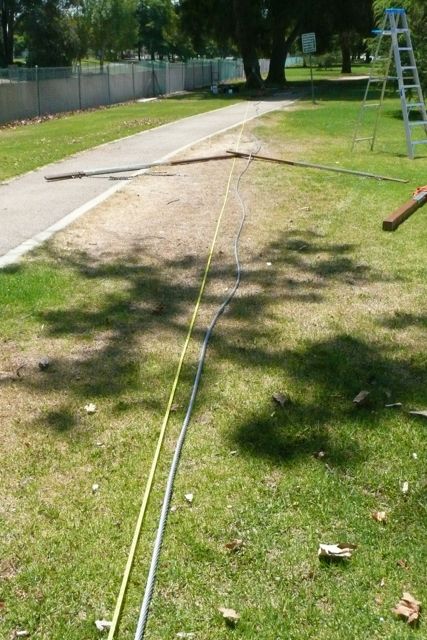
025_layingoutwire
Before I rolled out the walk cable, I first lay out a measuring tape from anchor point to anchor point – this provides a blueprint of where the cable and wood supports will be positioned to raise the walk and hoist wires.

024_nonhoistend
The opposite end of the walk cable is directly threaded into the shackle that secures the wire sling around the other anchor tree.
024_entrancetowire
Another view of the end that I enter the wire on.

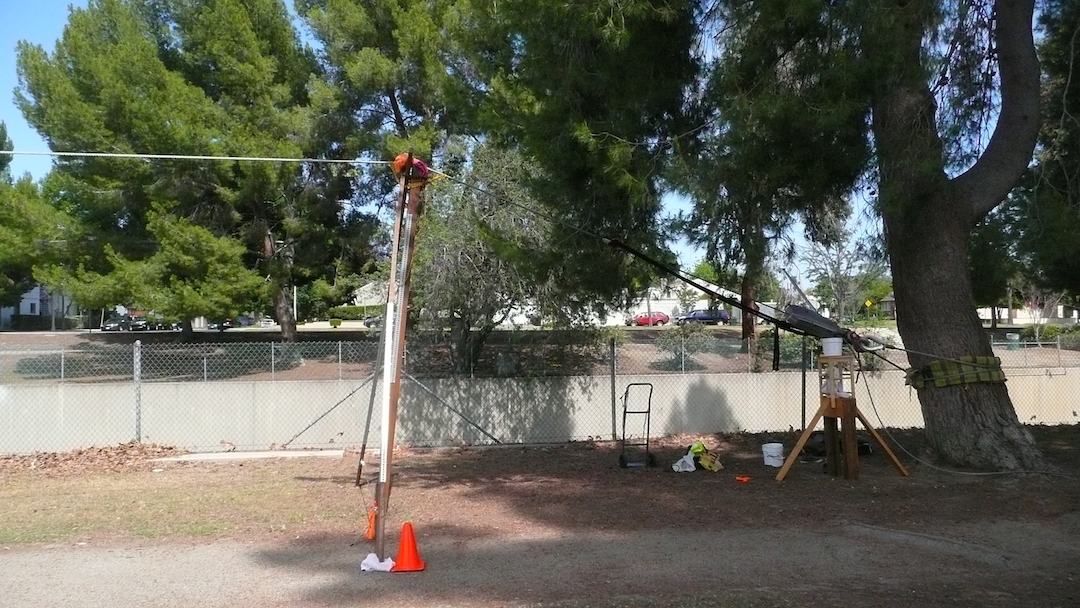
023_raisethehoist
Next, I raise the cable on top of my 8-foot ladder, then position one set of my bolted 2×4 wood supports under the cable and then remove the ladder. I temporarily tie the cable around the top of the wood to prevent the wood supports from falling over in either direction.
022_keepingtaught
To ensure the 2x4s do not do slide apart suddenly, I tie a rope to the small cable that will eventually link the two boards together. I use the rope to pull the cable (and one wooden board) toward the other board where the small cable will attach.
021_slackwire
I repeat this process for the second 2×4 wooden support. Both wooden supports have that small cable at their base, keeping their feet from spreading. The walkcable, as you can see above, hangs slack at this point.
020_topofsupportview
It’s a magical moment when the cable lies dormant, it’s height only caused by the wooden supports…
019_wireup
The handle on the griphoist now is cranked back and forth to pull the cable slowly through the Griphoist.

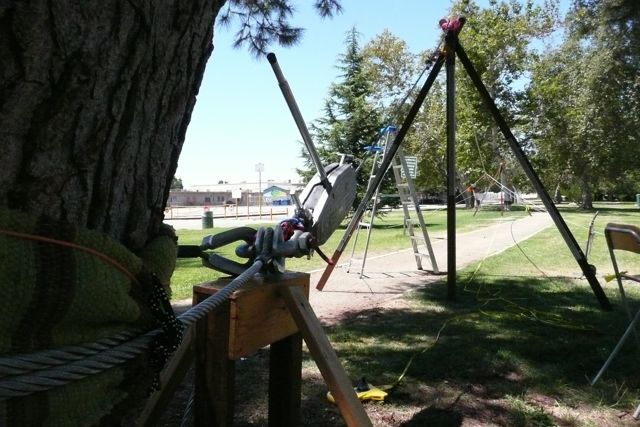
018_middle4x4
Once the cable and wooden 2×4 supports are centered and aligned, I position a central 4×4 post under the cable andbehind each set of 2x4s. Since my griphoist can tension the cable to over three tons, the function of the 4×4 is to take the brunt of the downward force that is applied to the cable.
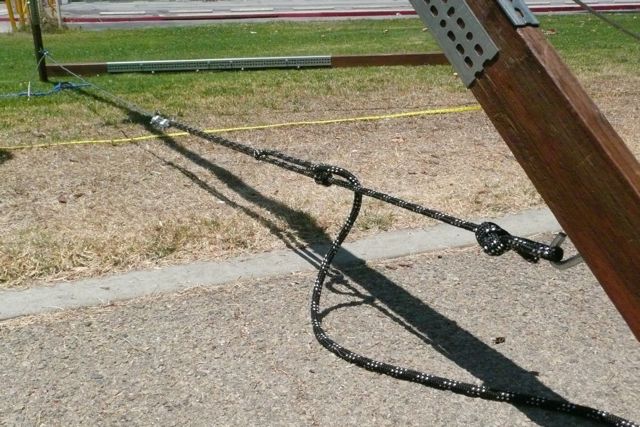
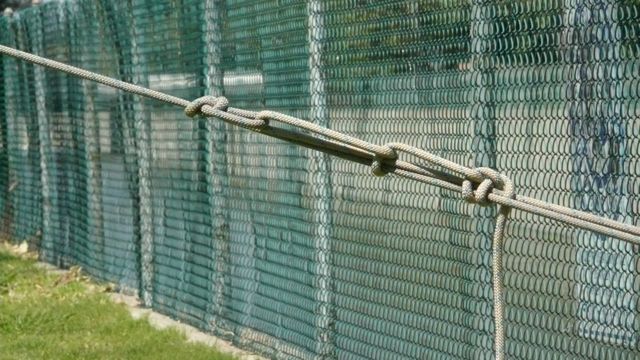
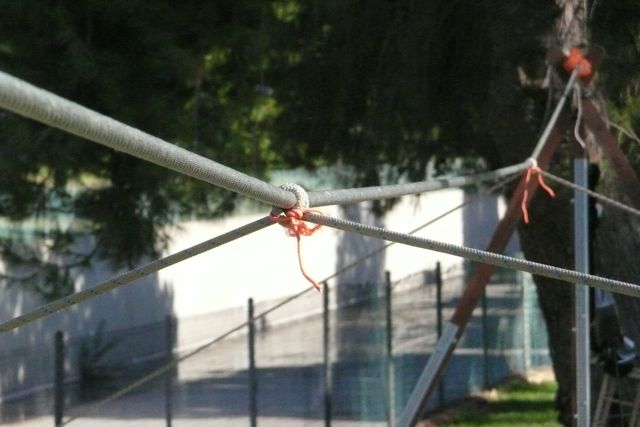
017_guyline
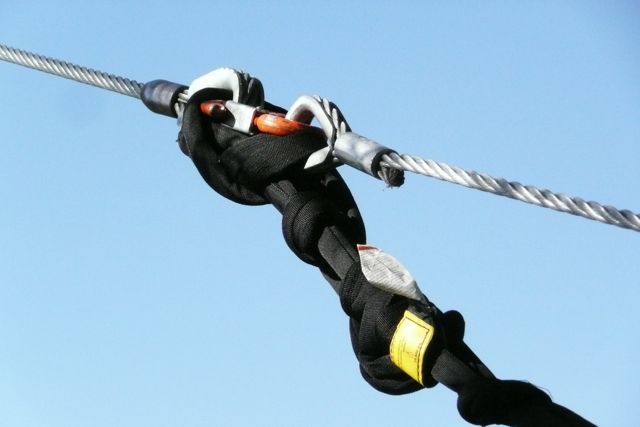
I secure my walk cable with two guylines. Above is one half of one guyline – I use a clove hitch to secure the middle of the guyline to the cable and I use sheep shank knots to connect various lengths together.
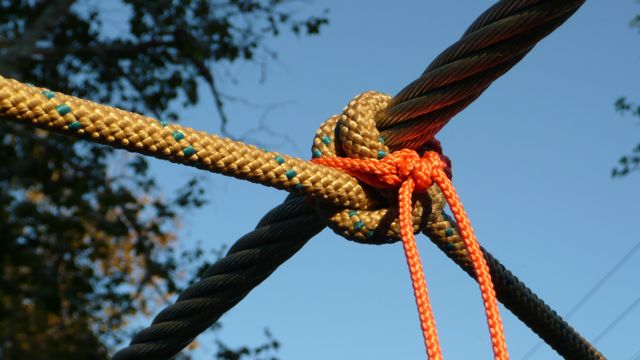
016_tiedclovehitch
The clove hitch.

015_bothguylines
Both guy lines are attached to the slack walk wire.
014_tensioningup
Longer view of the slack walk wire with guy lines…
013_readytotension
The hoist is cranked until the walk wire is tensioned. This raises the griphoist unit.
012_deathwalk
The opposite end tightens…
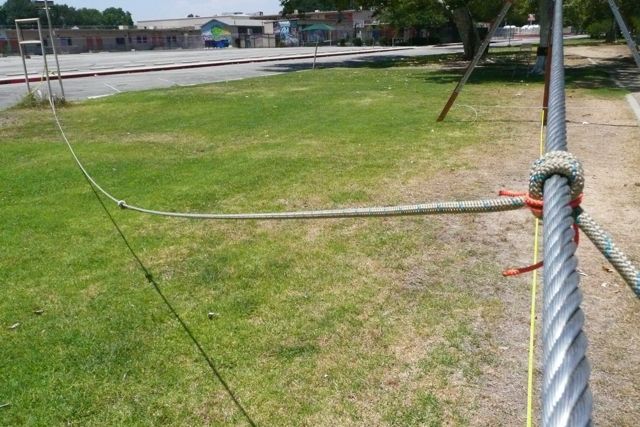
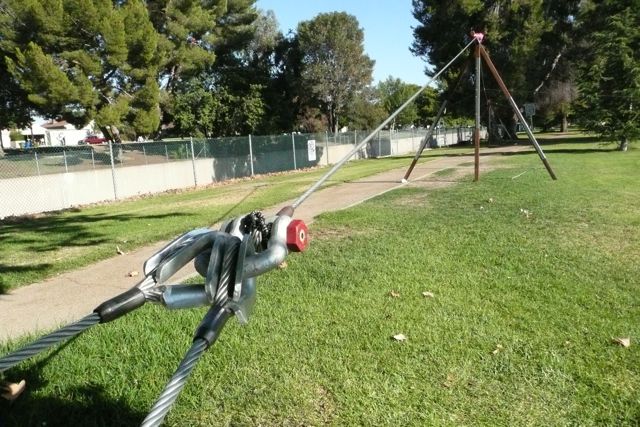
011_clip
Griphoist cable has the orange clip that clips into the walk cable photo right.
011_polybackup
For back up, I tie a 4000 lb poly rope sling into the end of the walk cable and secure it to the monster shackle. Should the hoist fail, the poly rope would provide a back up catch.
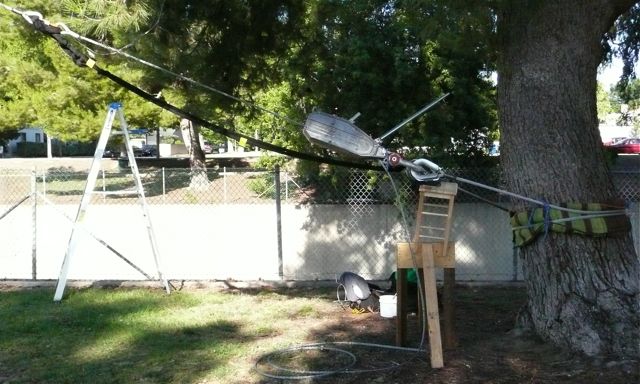
010_hoistendview
I position objects beneath the Griphoist to reduce the bouncing and concurrent vibrations the hoist will causes by my walking if not secured.
009.5_slant
The wood x is intentionally kiltered outward. This is to counter my weight as when I walk the wire, the x will lean back inward due to my weight.
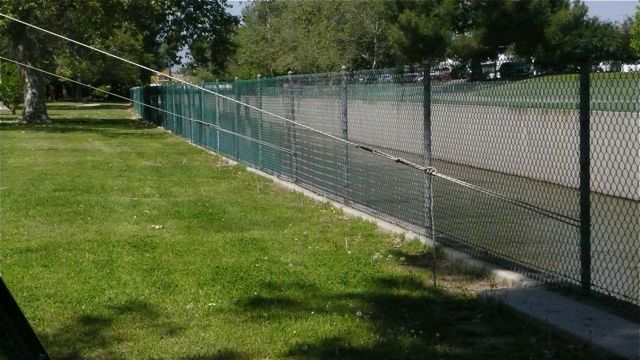
009_taughtguylines
Guylines are then tensioned tightly on each end (4 ends), which helps to secure the walk cable from moving left and right.
008_tensionknot
I tension guylines by creating a bowline knot several feet from where the rope is anchored (left side). Then I loop the rope end around the anchor (fence), back through the bowline loop – this is where I pull the slack out. Then I use a half hitch to secure the tension (middle) and finally a clove hitch to tie off the end (right side).
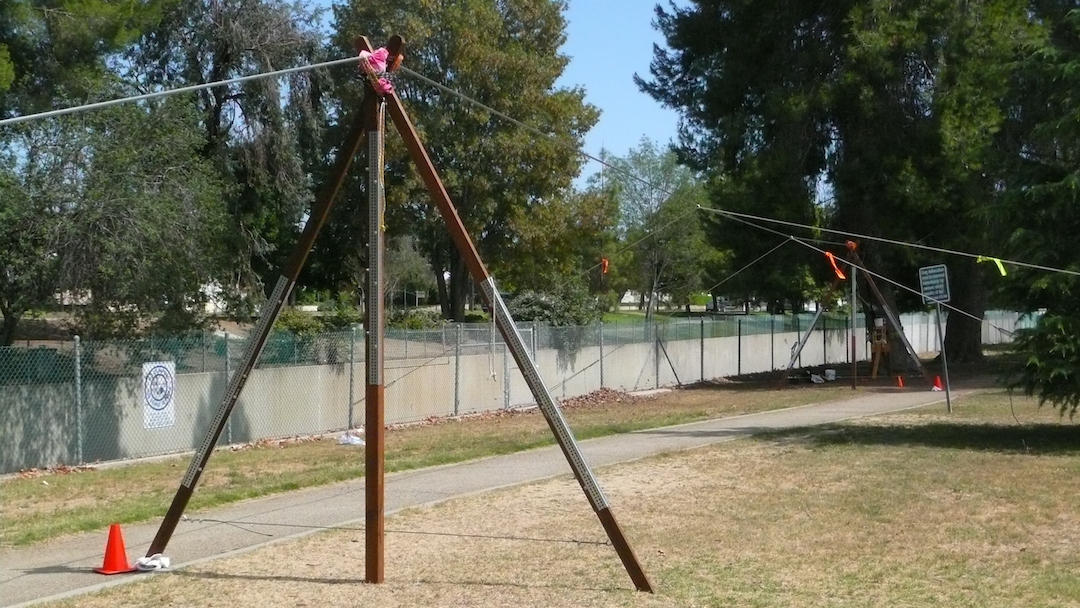
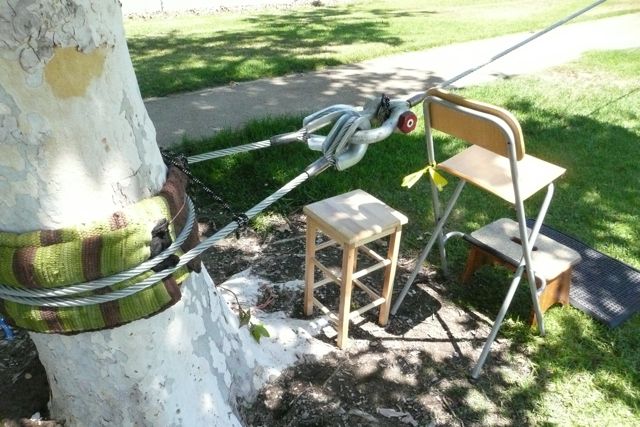
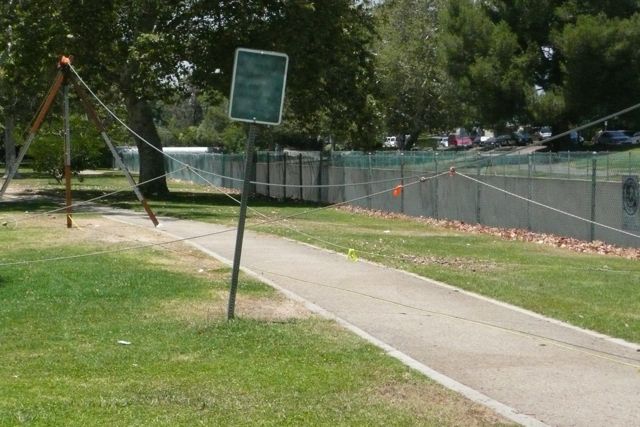
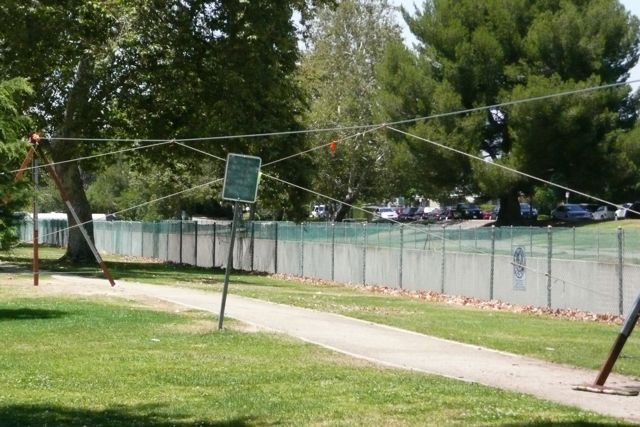
007.5_whole
This is the full rigging set up.

007_wholerigging
The whole rigging from the ground level hoist end perspective.
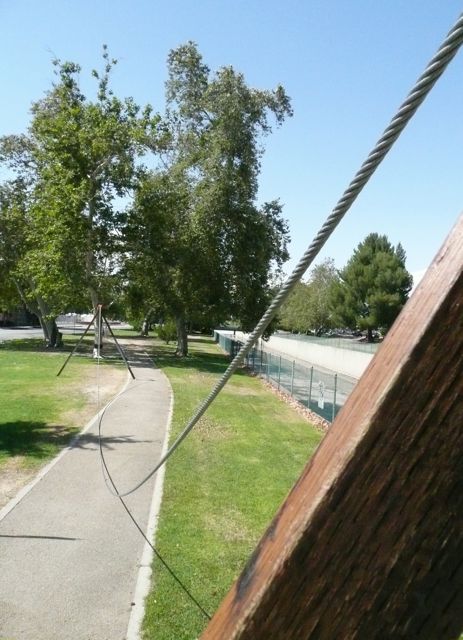
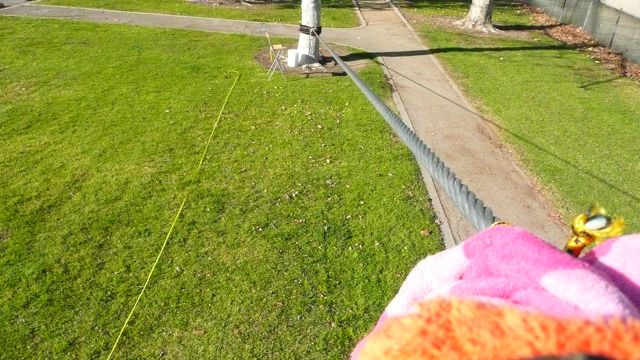
006_wire
View of the cable from the side and end…
005_tie4x4
Once the cable and guylines are tensioned, I tie each 4×4 to the bolted 2x4s and then secure the wood supports to the cable itself by going back and forth between the cable under the wood 2x4s. This is to ensure the wood support does not move when walked upon. You can also see the padding applied under the cable that I employ to protect the cable.
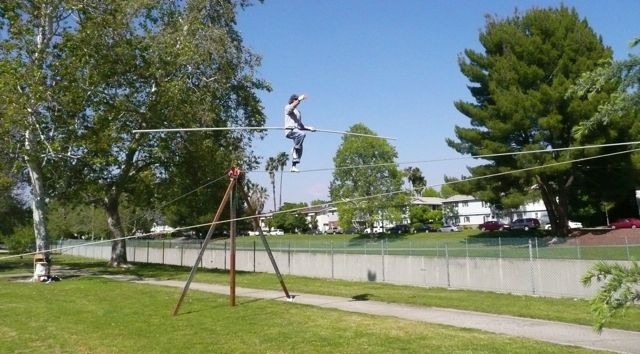
004_afterincline
The cable can now be walked on and is around 11 feet high at the wood support ends and 10.5 feet high at the cable’s midspan (guyline tension brings the walk cable down those few inches as does both the cable and the walker’s weight).
003_deathwalkincline
Top view of the inclined end I walk up to the first support. This is called a “death walk.”
002_cantenarycurve
The cable’s natural cantenary curvature is amplified and further abstracted by the tensioned guy lines.

001_1aug2011rigging
Top view of the finished and tensioned walk cable at 10′ 8″ high.
004_z11Jan2010
When I began learning to tension fiber rope, I was using wire clamps wrong and zig zagging static climbing rope between four carabiners to pull manila rope tight.